“模组:IDE 参考”的版本间的差异
跳到导航
跳到搜索
1059 Studio(讨论 | 贡献) |
1059 Studio(讨论 | 贡献) |
||
| 第46行: | 第46行: | ||
# 在 '''应用程序''' 选项卡,在 '''目标框架''' 下拉菜单中选择 '''.NET Framework 4.5''':<br />[[File:Modding - IDE reference - change target framework (Visual Studio 2) - ZH.png]] | # 在 '''应用程序''' 选项卡,在 '''目标框架''' 下拉菜单中选择 '''.NET Framework 4.5''':<br />[[File:Modding - IDE reference - change target framework (Visual Studio 2) - ZH.png]] | ||
# 然后会弹出确认对话框,点击 '''是''' 确认更改:<br />[[File:Modding - IDE reference - change target framework (Visual Studio 3) - ZH.png]] | # 然后会弹出确认对话框,点击 '''是''' 确认更改:<br />[[File:Modding - IDE reference - change target framework (Visual Studio 3) - ZH.png]] | ||
| + | |||
| + | ==添加文件== | ||
| + | <span id="add-file"></span> | ||
| + | |||
| + | ===在 Visual Studio 2019 中=== | ||
| + | # 打开解决方案资源管理器,如果忘了怎么打开回去看上边的。 | ||
| + | # 右键你的项目,选择 '''添加 » 新建项''':<br />[[File:Modding - IDE reference - create file (Visual Studio 1) - ZH.png]] | ||
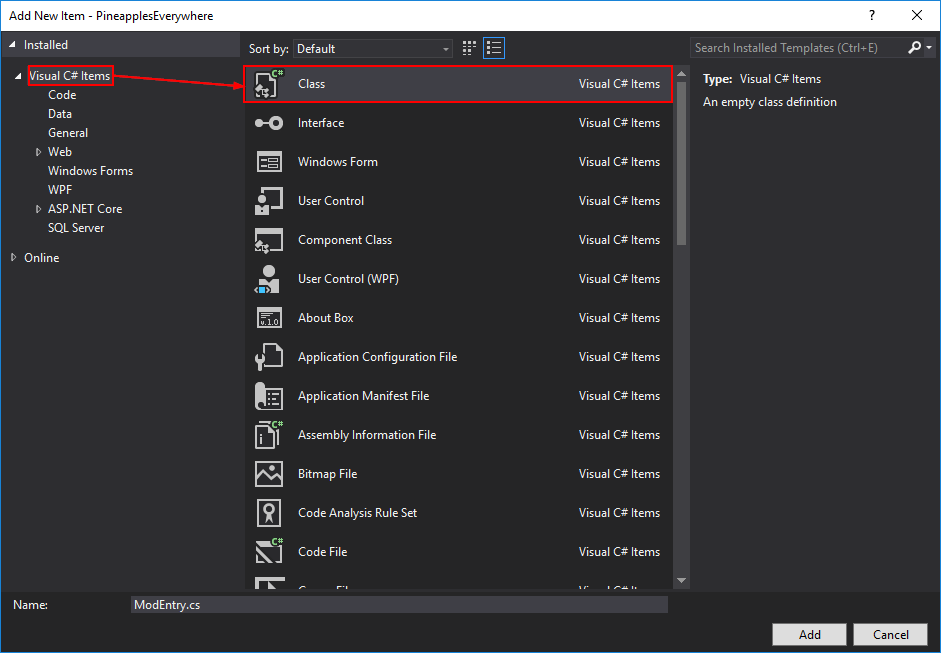
| + | # From the 'Add New Item' window, choose the file type (usually ''Visual C# Item » Class''):<br />[[File:Modding - IDE reference - create file (Visual Studio 2).png]] | ||
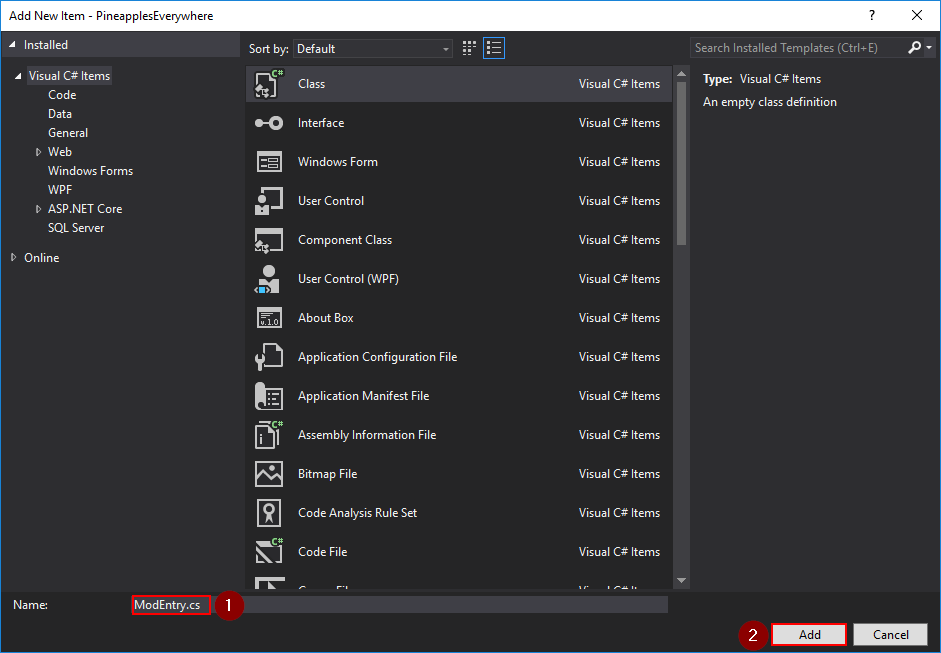
| + | # Enter a descriptive file name and click ''Add'':<br />[[File:Modding - IDE reference - create file (Visual Studio 3).png]] | ||
2021年4月14日 (三) 09:34的版本
←目录

|
不完整的翻译 本文或部分尚未完全翻译成中文。
欢迎您通过编辑帮助其建设。 |
此页面描述了如何使用 Visual Studio 2019 或 MonoDevelop/Visual Studio for Mac 来制作 SMAPI 模组。参阅在主页面中的 创建 SMAPI 模组
在你开始之前
- 安装 Visual Studio Community (Windows)、MonoDevelop (Linux)、Visual Studio for Mac (Mac)
- 你应该具备 C# 入门基础
- 以下是一些需要记住的基本术语:
term definition IDE 开发环境,就是现在你的 Visual Studio 或 MonoDevelop DLL .dll 后缀的文件(全称叫 动态链接库,英文 Dynamic Link Library),文件包括了你的代码,SMAPI 将加载的东西 项目 每个项目在生成(编译,或者说是构建)的时候都会生成独立的文件 解决方案 项目的集合,每一个工程可以包含多个项目。所谓的工程也称为解决方案,可以理解为要解决问题的方案,可能听起来有点奇怪,不过这是专业术语
创建一个模组项目
在编写模组的代码之前,需要创建一个解决方案和一个包含它的项目
Windows (Visual Studio 2019)
- 打开 Visual Studio 2019.
- 点击 创建新项目
File:Modding - IDE reference - create project (Visual Studio 1) - ZH.png - 筛选器选择语言 C# 和 库,然后选择 类库(.NET Framework),点击 下一步。确保你选择了正确的选项,否则是不会起作用的
File:Modding - IDE reference - create project (Visual Studio 2) - ZH.png - 在 配置新项目 窗口中:
- 输入你的模组名称。按照约定,名称应该是一个由几个单词去除空格连起来的字符串(例如 MyNewMod,避免使用特殊字符,如果实在看不习惯可以用下划线来代替空格。可以使用中文,不过这会让其他国家的玩家感到困惑,所以为了便于在国际上交流请尽可能避免使用中文)。
- 取消勾选 将解决方案和项目放在同一目录中
- 确保选择的是 .NET Framework 4.5.2
- 点击 创建 来创建项目
设置目标框架
目标框架 是代码使用的 .NET Framework 版本,它会影响运行模组所需的版本。
推荐的目标框架是 .NET Framework 4.5,它是 SMAPI 所使用的框架版本
那为什么其他地方说推荐 4.5.2 ?,别问,我也不知道为什么
在 Visual Studio 2019 中
- 打开解决方案资源管理器。如果你那没有,可以从菜单栏的 视图 » 解决方案资源管理器 打开:
File:Modding - IDE reference - show solution pane (Visual Studio) - ZH.png - 右键你的项目,选择 属性,或者你也可以从菜单栏的 项目 » <项目名>属性 打开
File:Modding - IDE reference - change target framework (Visual Studio 1) - ZH.png - 在 应用程序 选项卡,在 目标框架 下拉菜单中选择 .NET Framework 4.5:
File:Modding - IDE reference - change target framework (Visual Studio 2) - ZH.png - 然后会弹出确认对话框,点击 是 确认更改:
File:Modding - IDE reference - change target framework (Visual Studio 3) - ZH.png
添加文件
在 Visual Studio 2019 中
- 打开解决方案资源管理器,如果忘了怎么打开回去看上边的。
- 右键你的项目,选择 添加 » 新建项:
File:Modding - IDE reference - create file (Visual Studio 1) - ZH.png - From the 'Add New Item' window, choose the file type (usually Visual C# Item » Class):
- Enter a descriptive file name and click Add:
.png)
.png)
_-_ZH.png)
_-_ZH.png)
_-_ZH.png)
_-_ZH.png)
_-_ZH.png)
_-_ZH.png)
_-_ZH.png)
_-_ZH.png)